How to Install ONTROLLER
How to Install ONTROLLER
Section titled “How to Install ONTROLLER”-
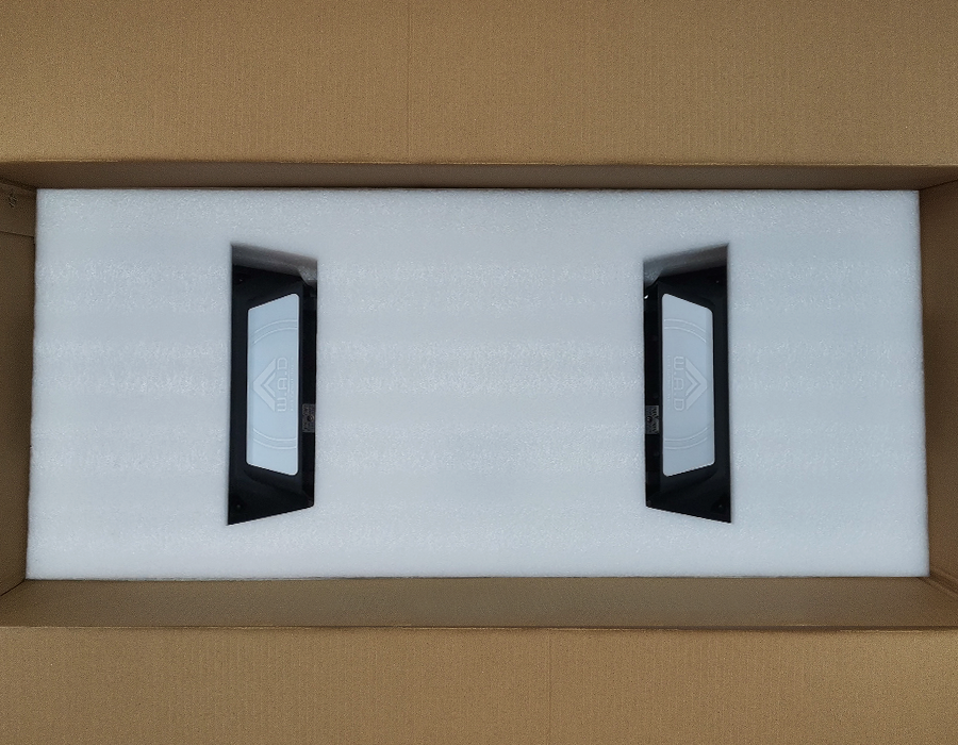
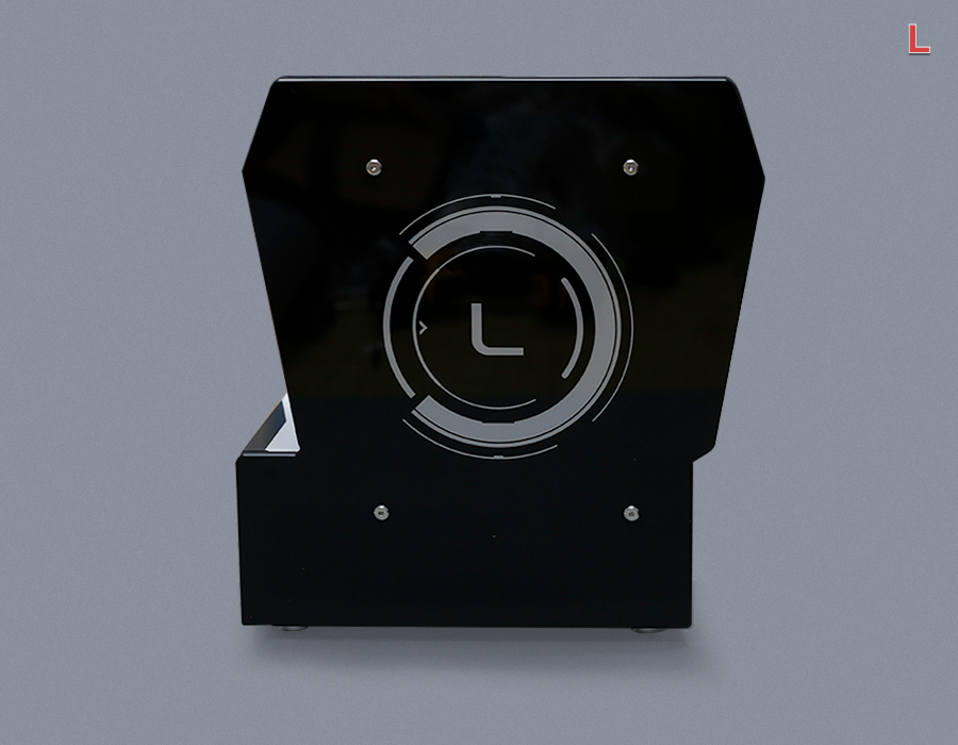
Unboxing
Unboxing, the picture shows the front.
-
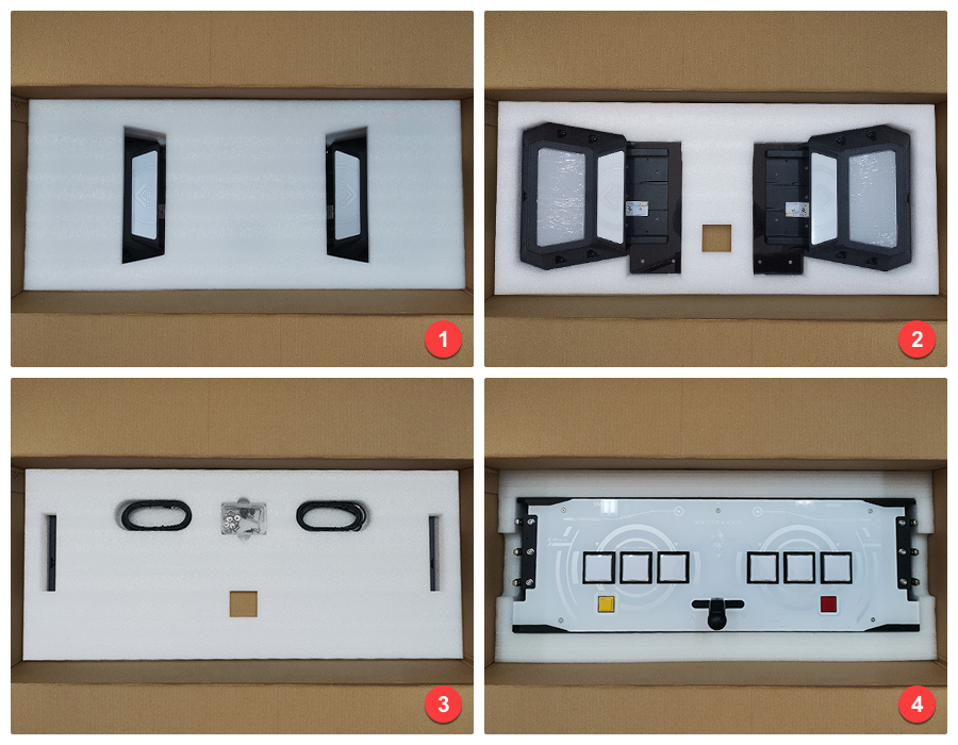
Remove Cushioning Material
Remove the cushioning material in the order shown.
-
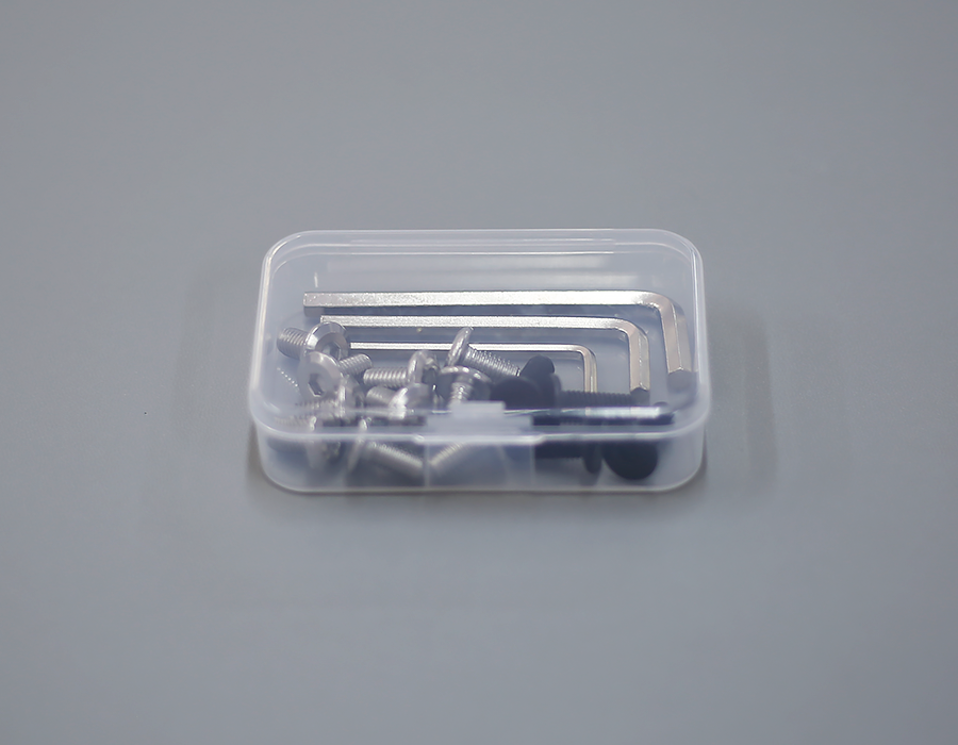
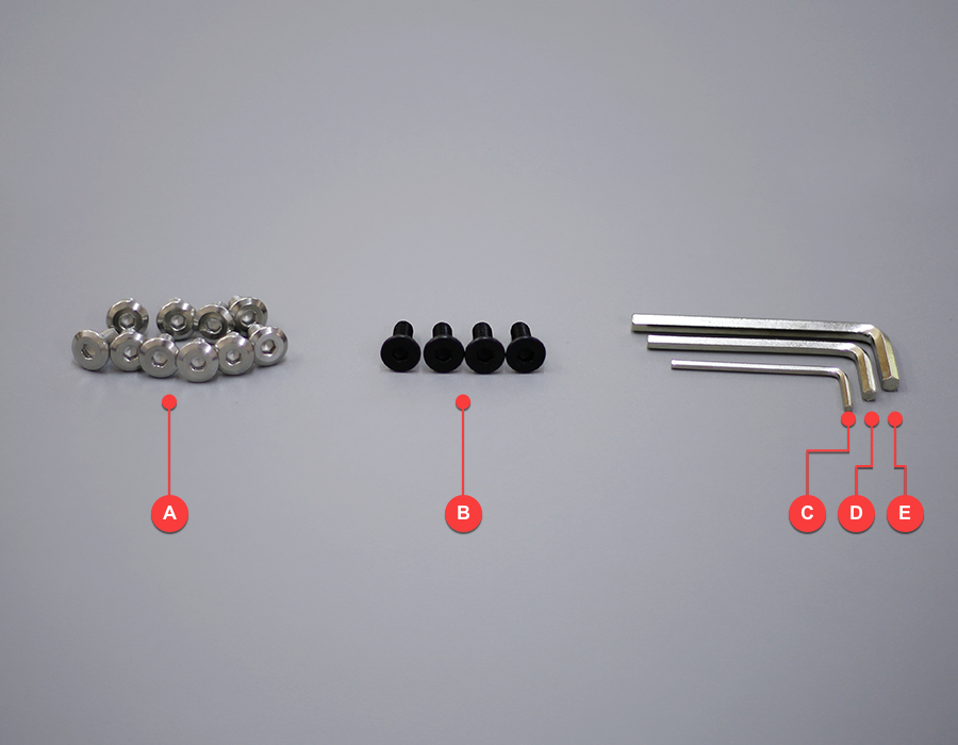
Prepare Installation Tools
Prepare installation tools.
-
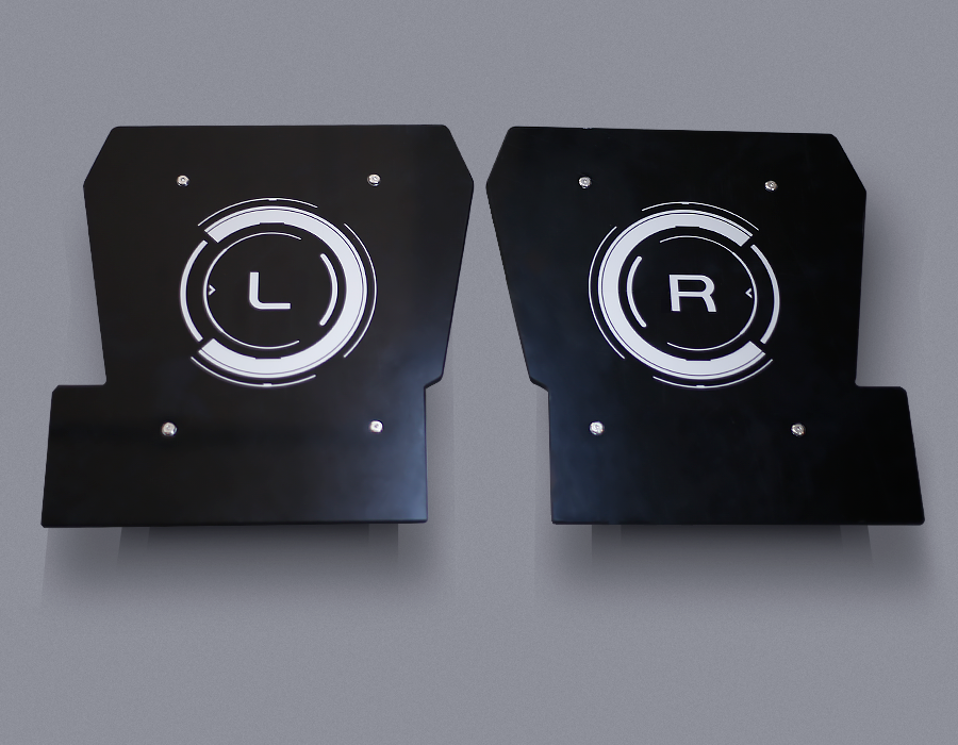
Remove Side Button Panels
Use tool C (2.5mm) to remove the outer decorative panels of the L and R side buttons.
-
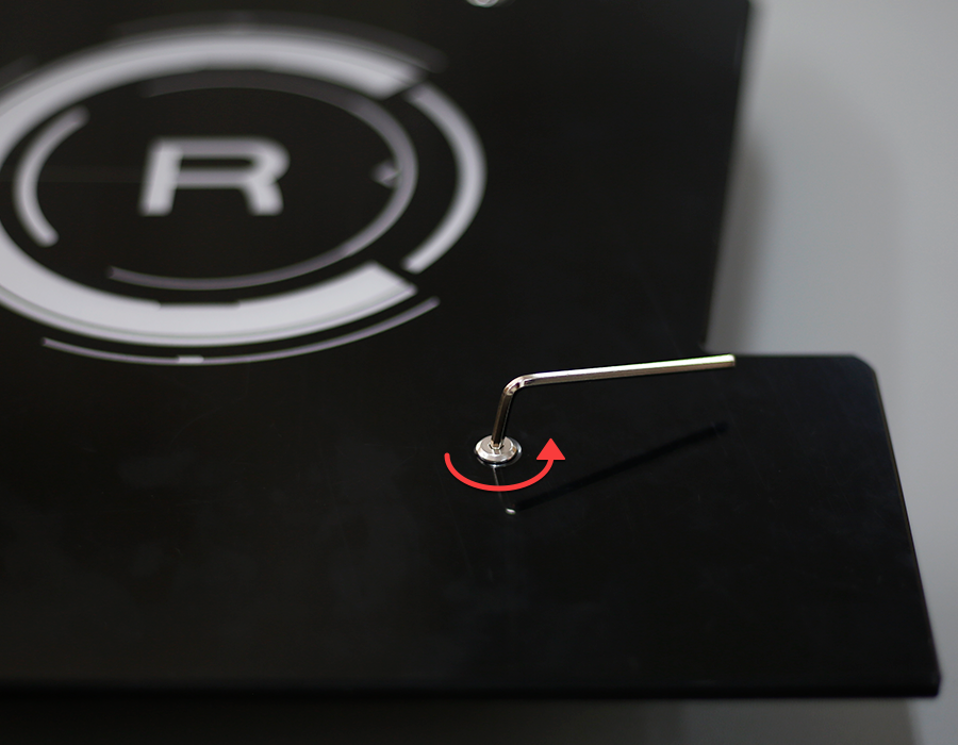
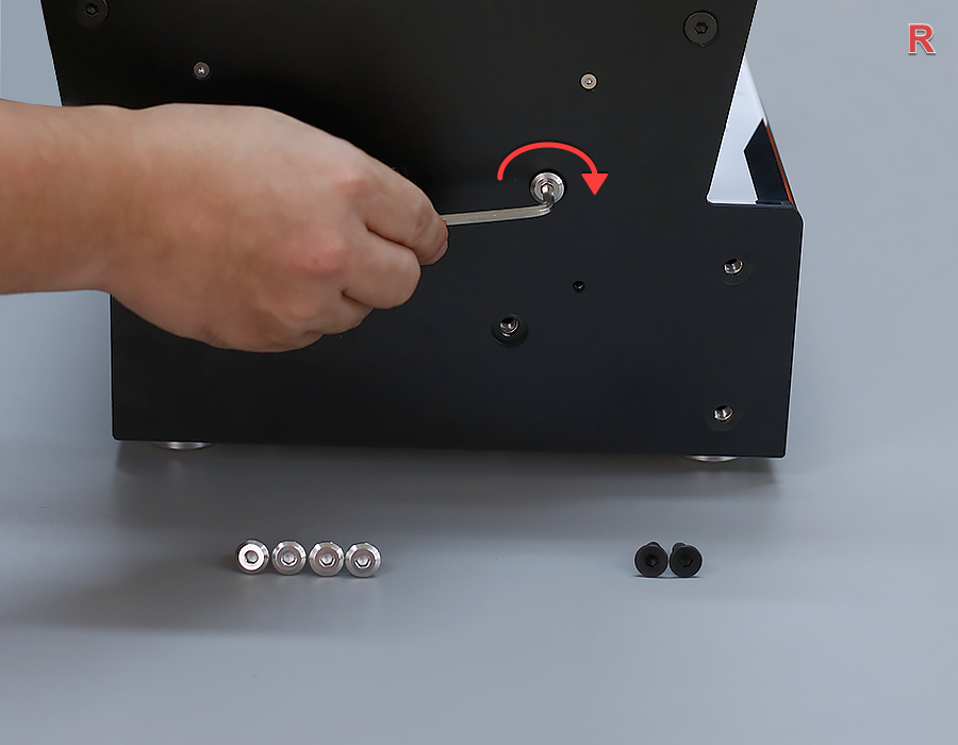
Unscrew and Remove Panels
Turn the hex wrench in the direction shown, unscrew the screws (keep them in the tool box), and remove the panels.
-
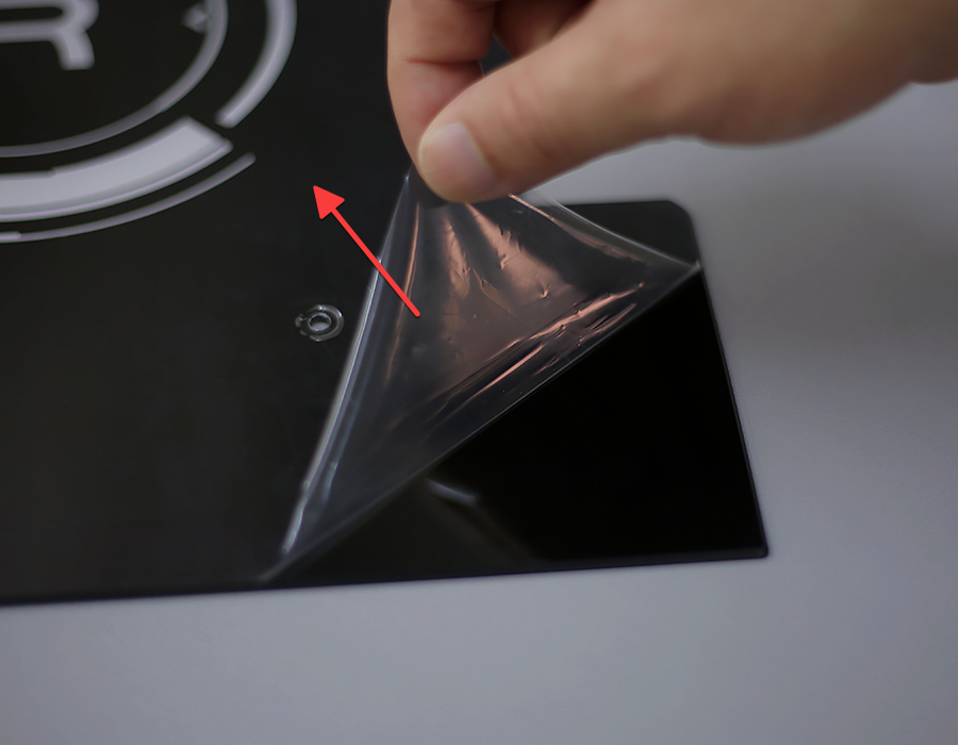
Remove Protective Film
Tear off the protective film of the L and R panels and place the panels in a safe place.
-
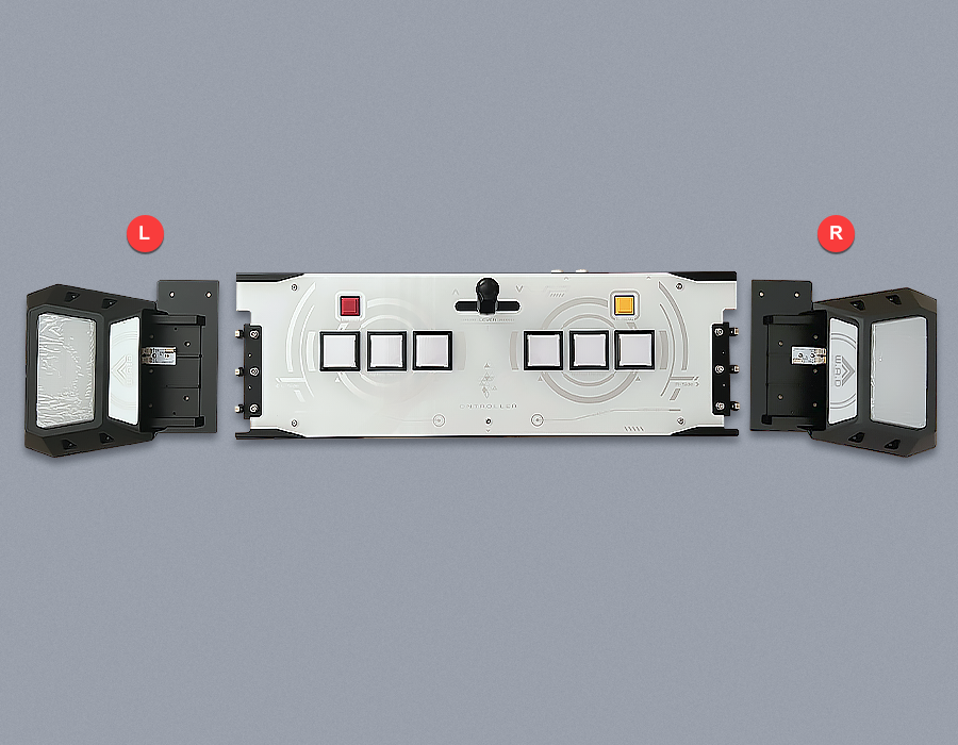
Take Out the Main Unit
Take out the main unit, place it in a convenient place for operation, and place the L and R side buttons on the corresponding sides.
-
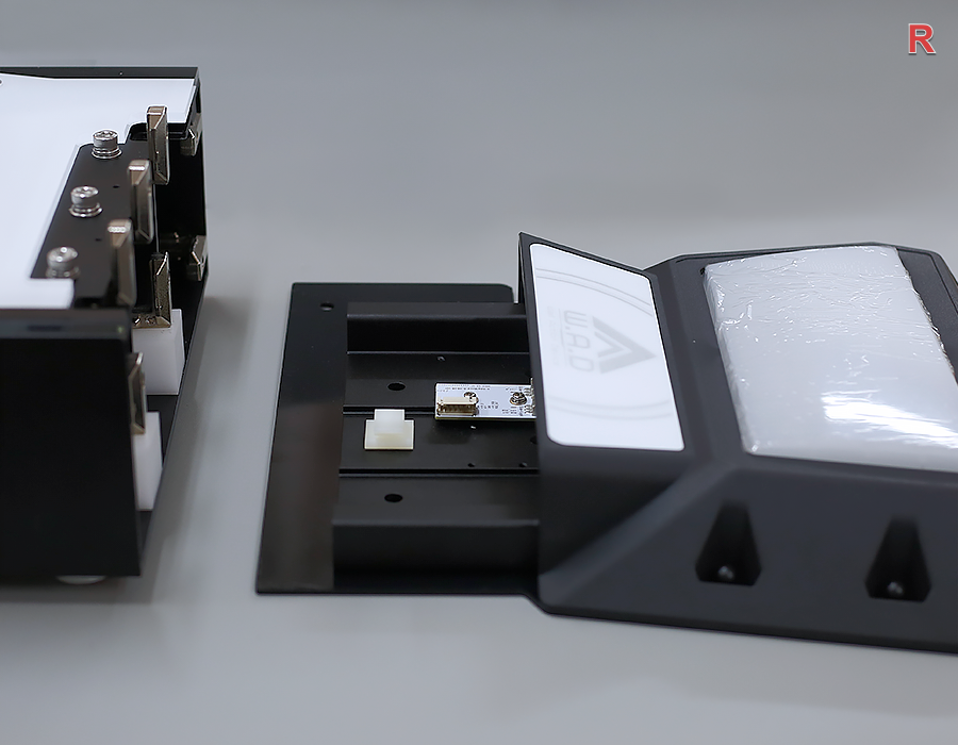
Assemble R Side Button
Assemble the R side button.
-
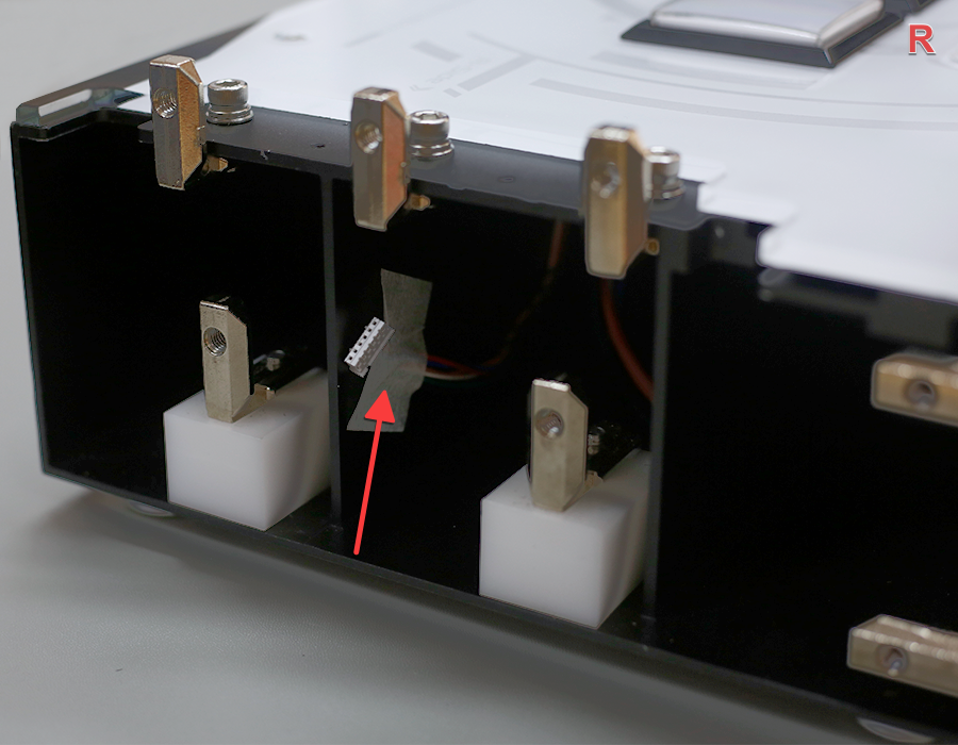
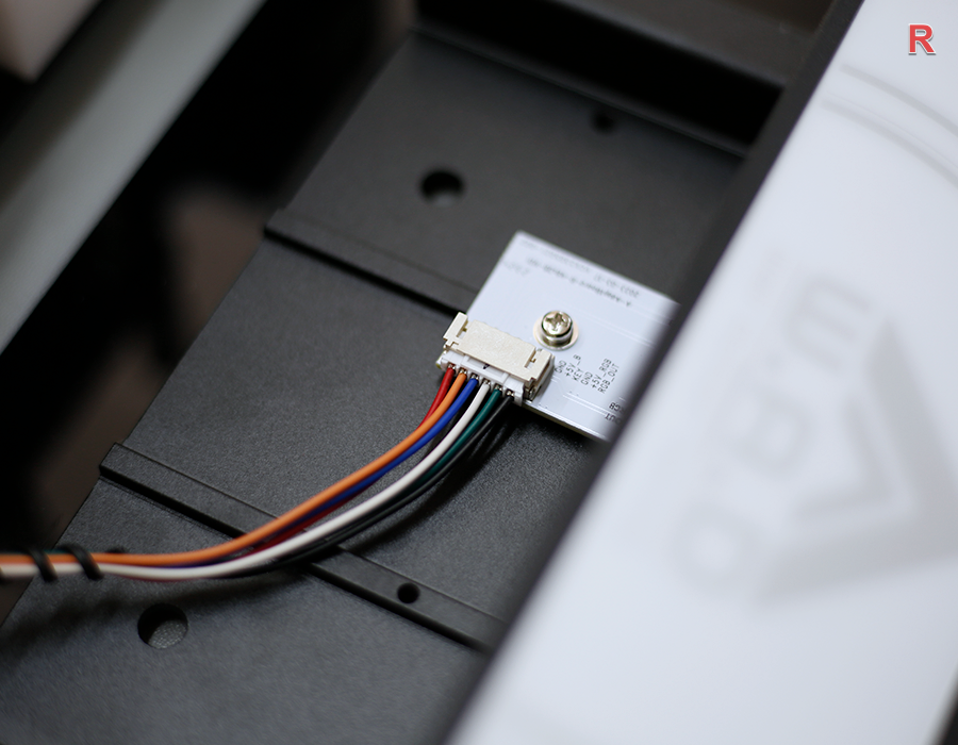
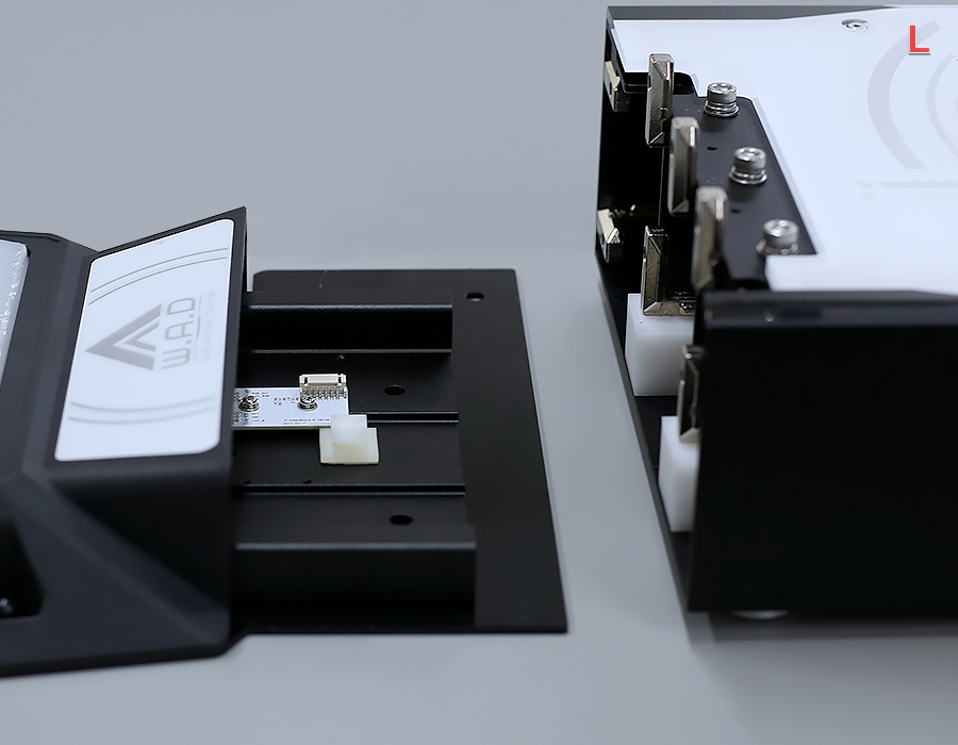
Locate Right Connector
From the side, you can see that the right plug is pasted with paper tape on the side of the main body.
-
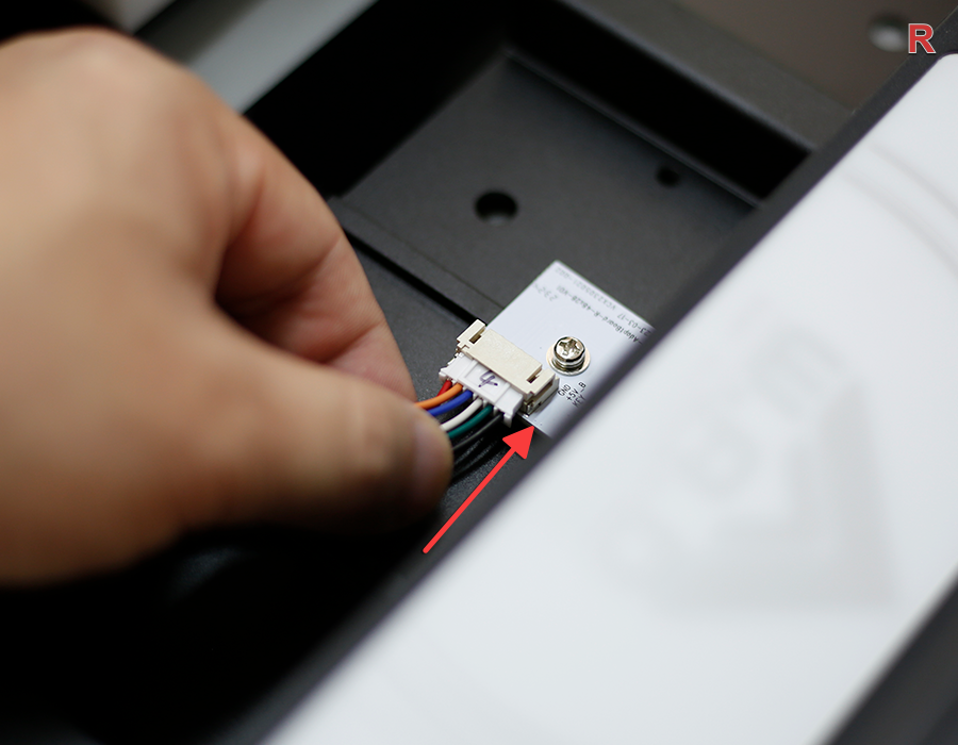
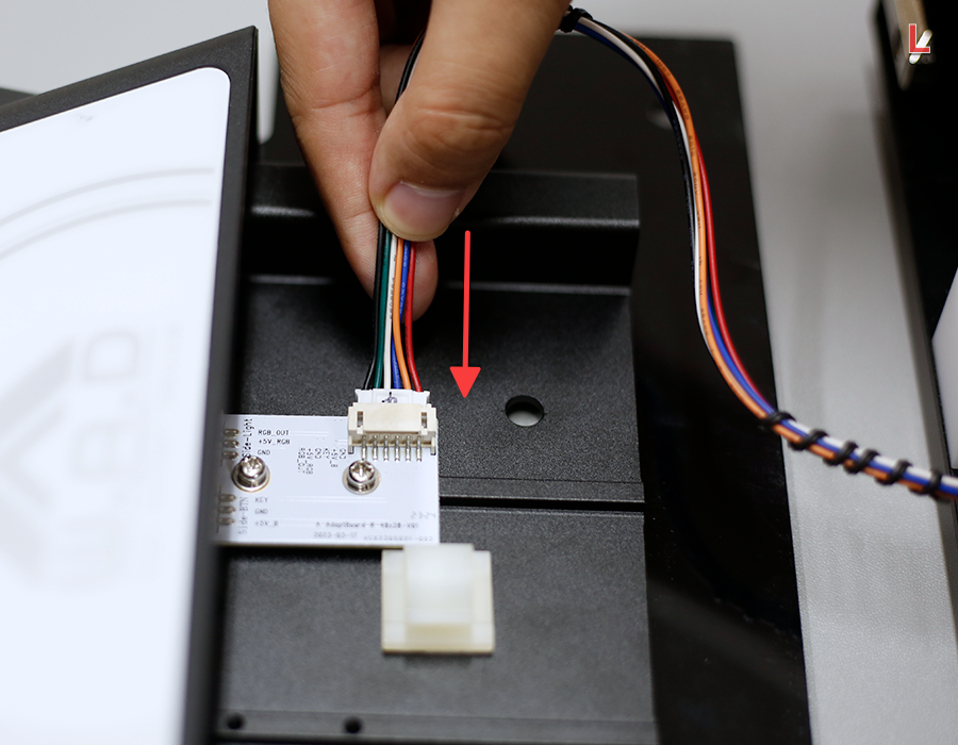
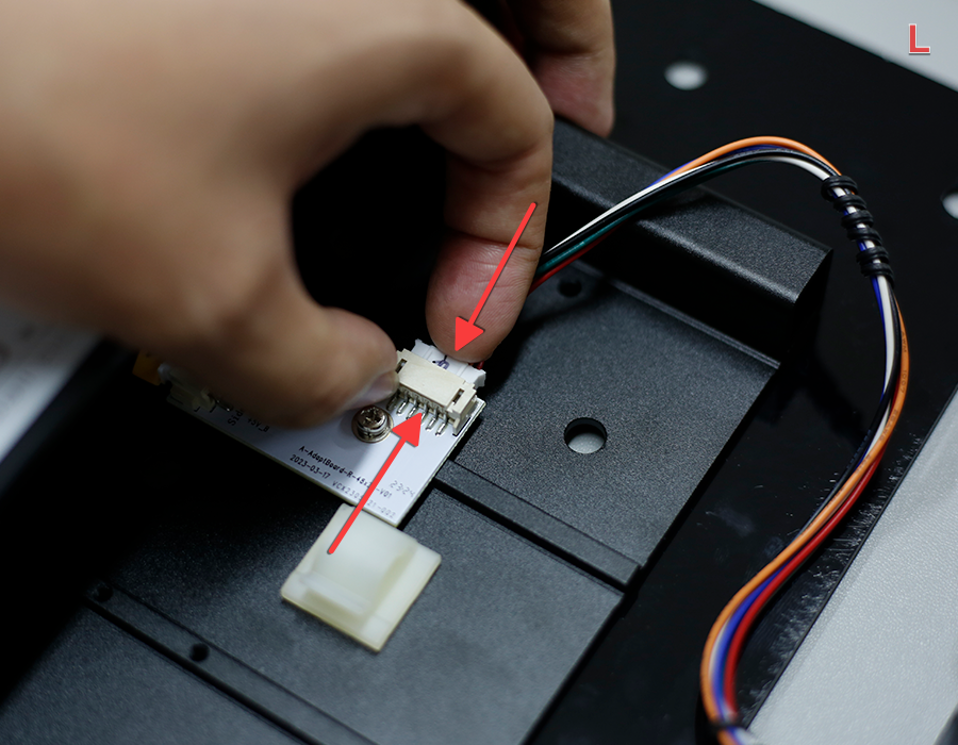
Connect Right Cable
Tear off the tape, gently pull the connector (remember not to pull with force), and insert the plug (the plug has a correct orientation — do not force it in).
-
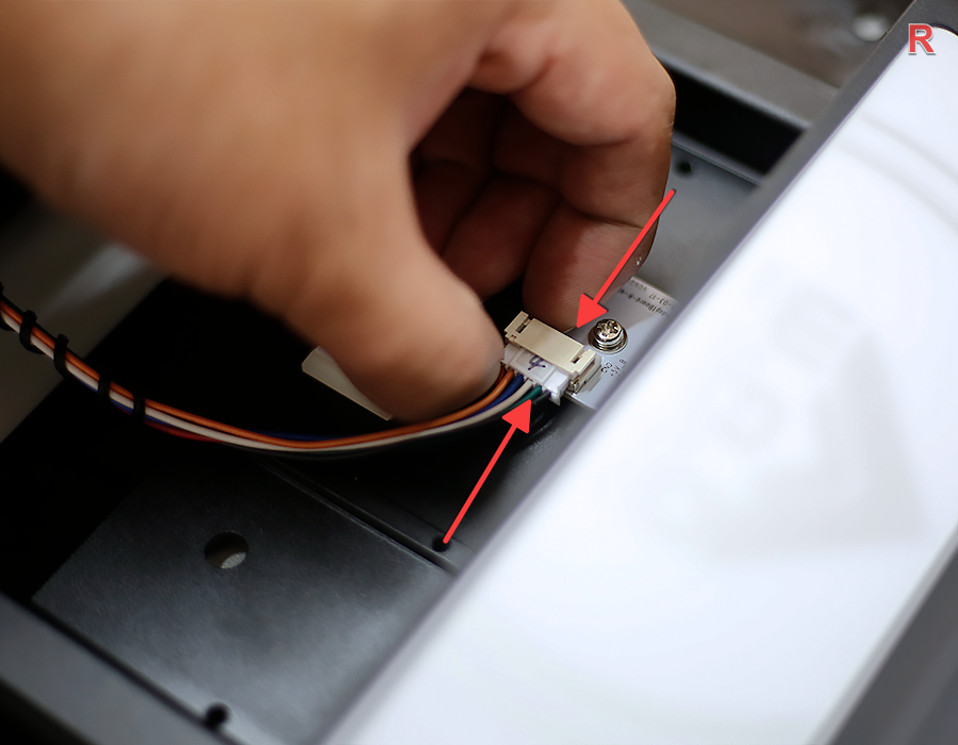
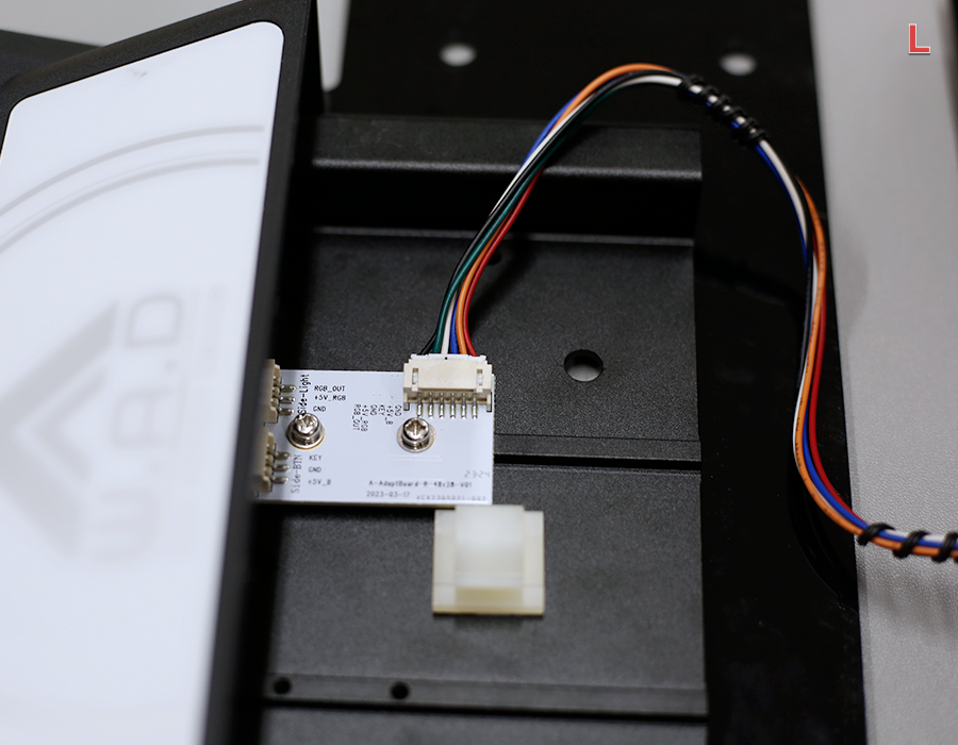
Confirm Connection
The wire is plugged in as shown in the picture.
-
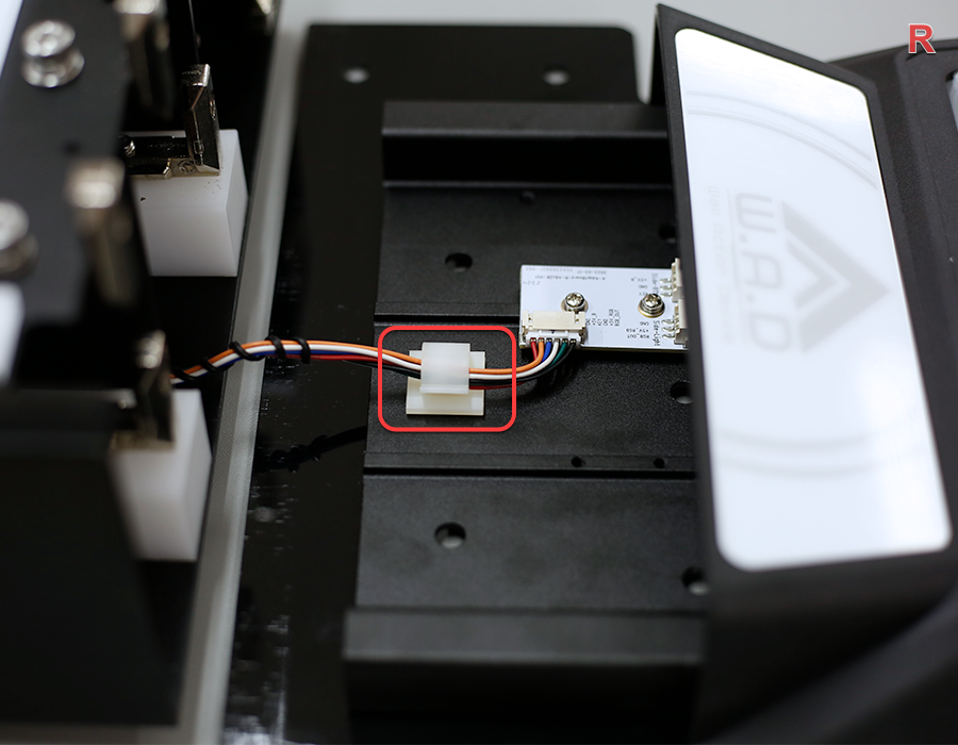
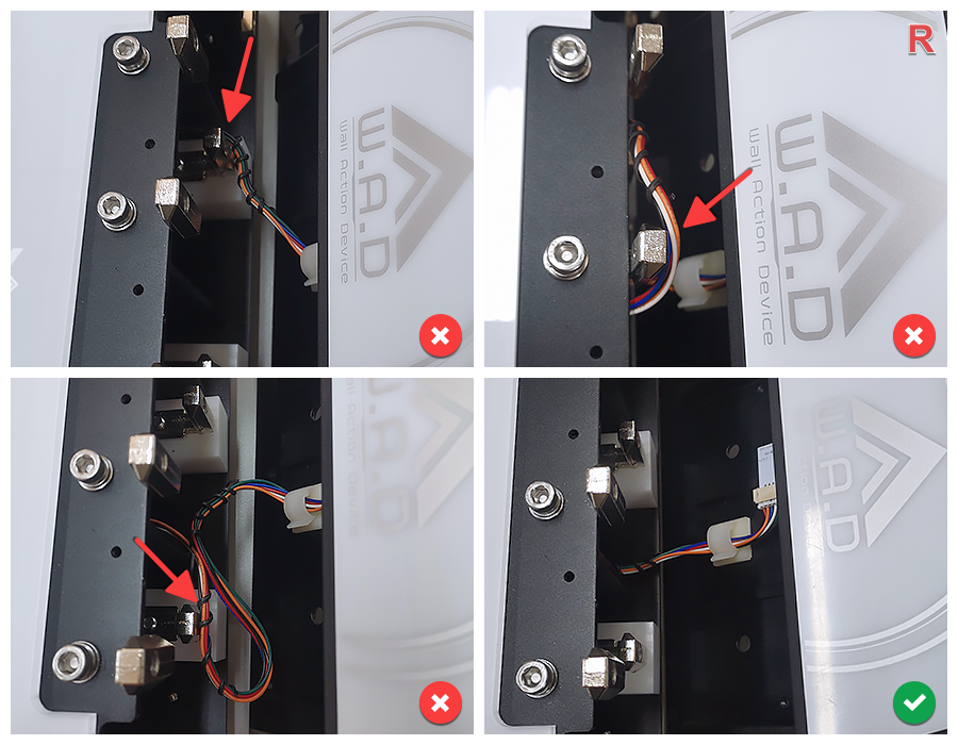
Secure the Cable
Secure the wire in the clamp as shown.
-
Close R Side Button
Assemble the R side button.
-
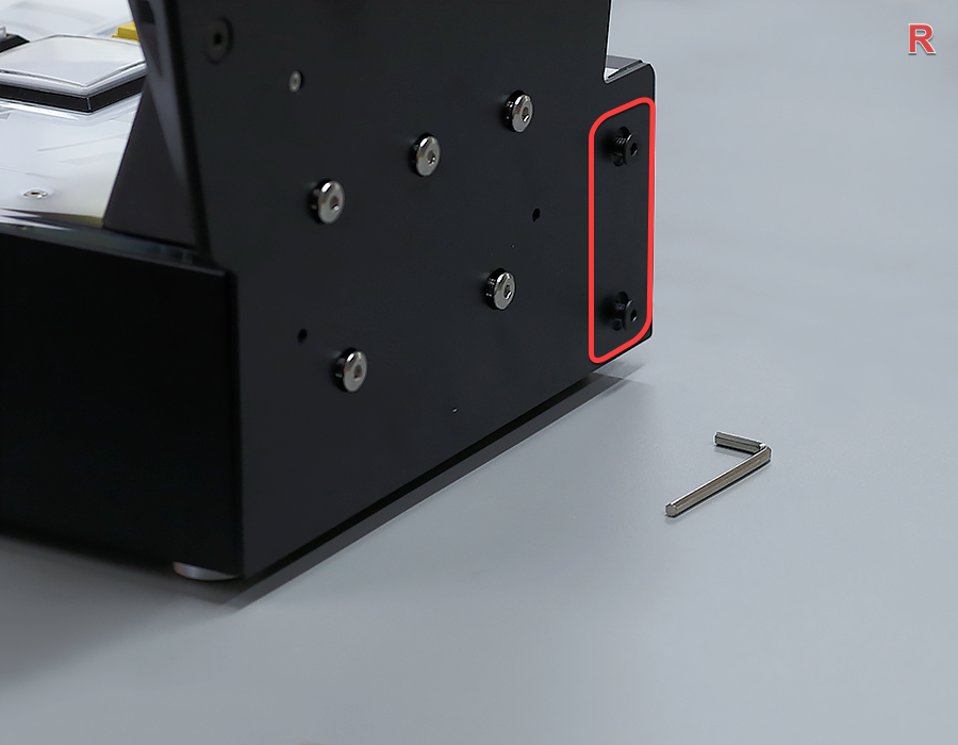
Fix R Side Outer Screw
Use tool D (4mm) to fix the screw on the R side.
-
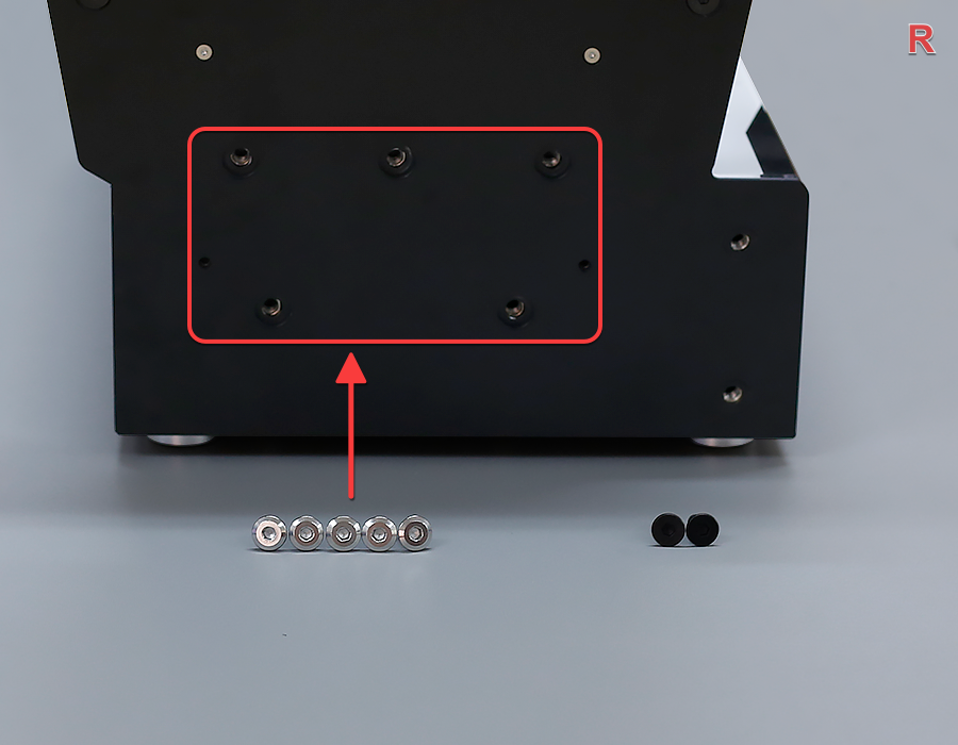
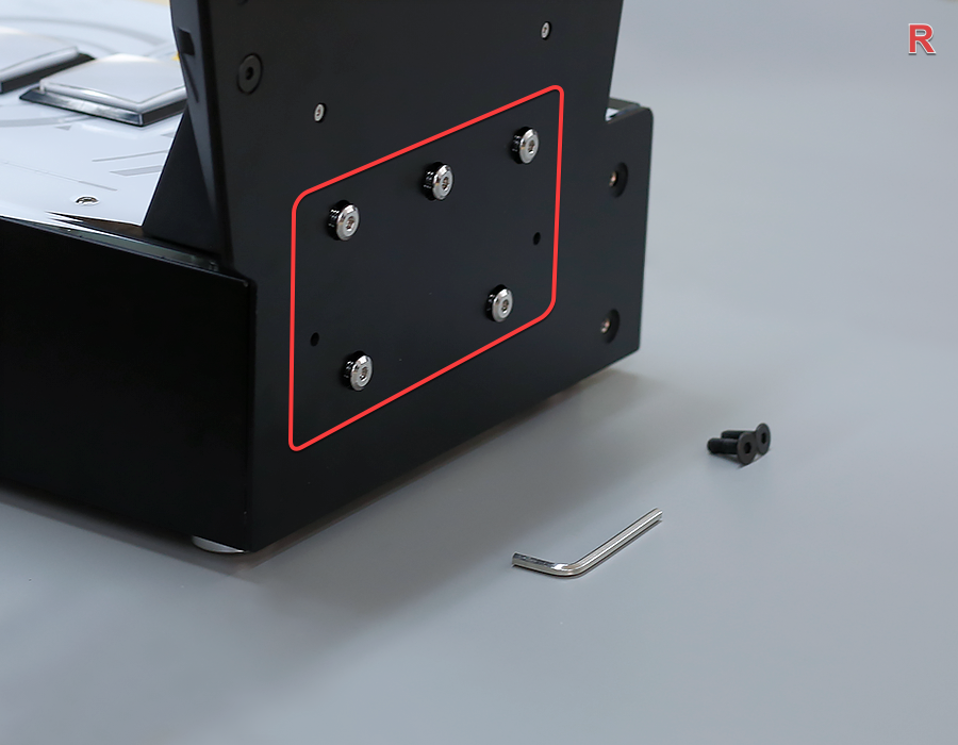
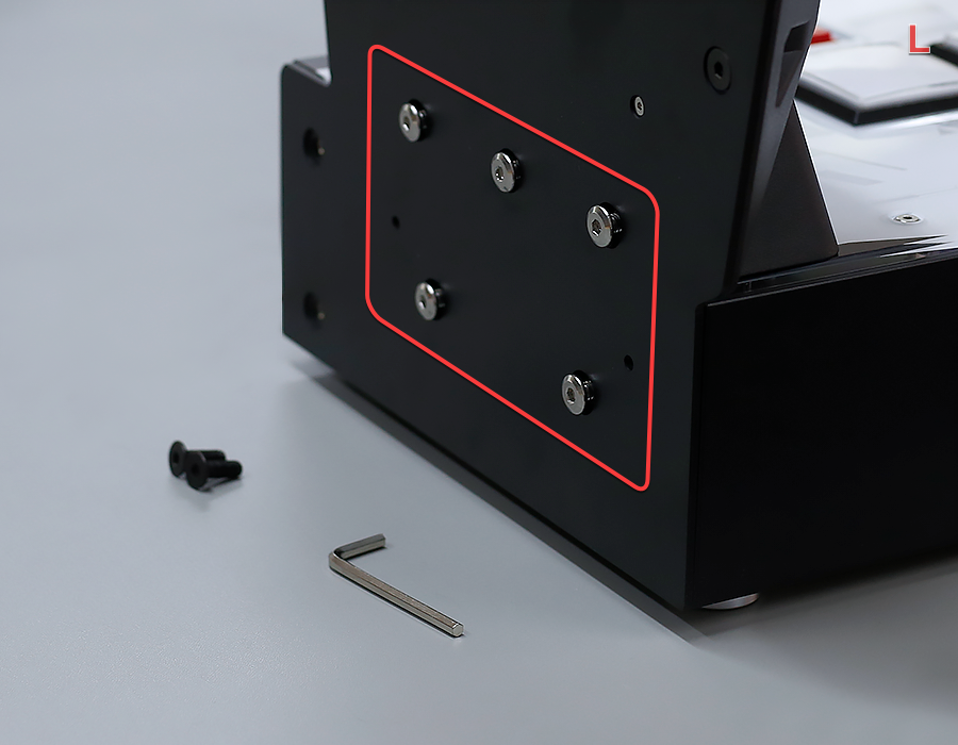
Pre-tighten 5 Silver A Screws
First, pre-tighten the 5 silver A screws. Do not tighten them completely to ensure that the side buttons can still move.
-
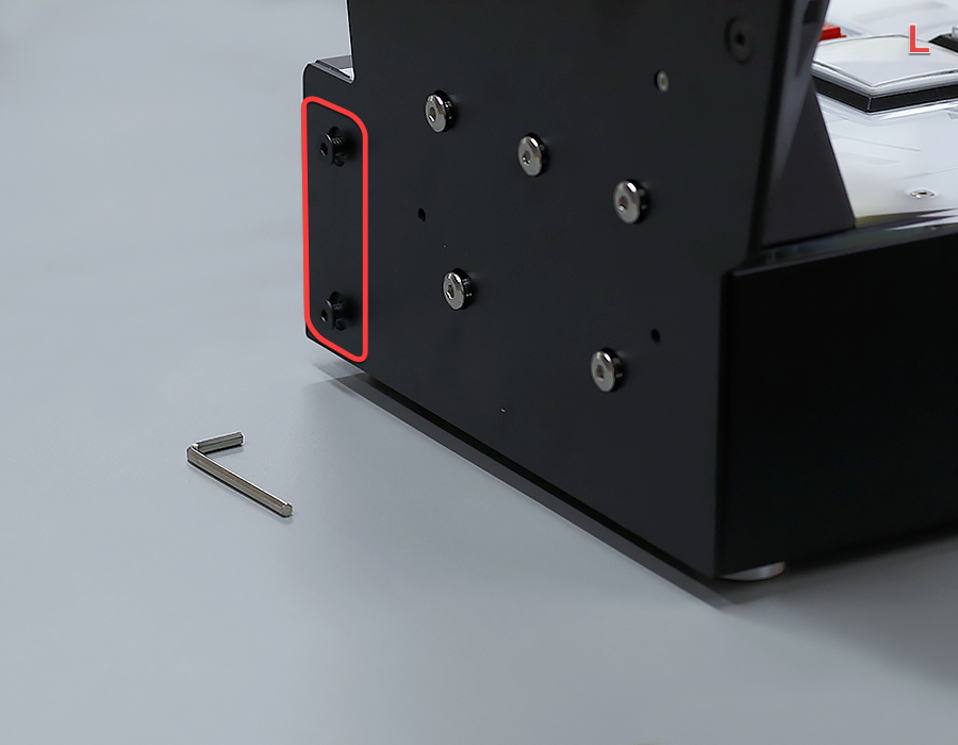
Pre-tighten 2 Black B Screws
Then, pre-tighten the 2 black B screws. Do not tighten them completely to ensure that the side buttons can still move.
-
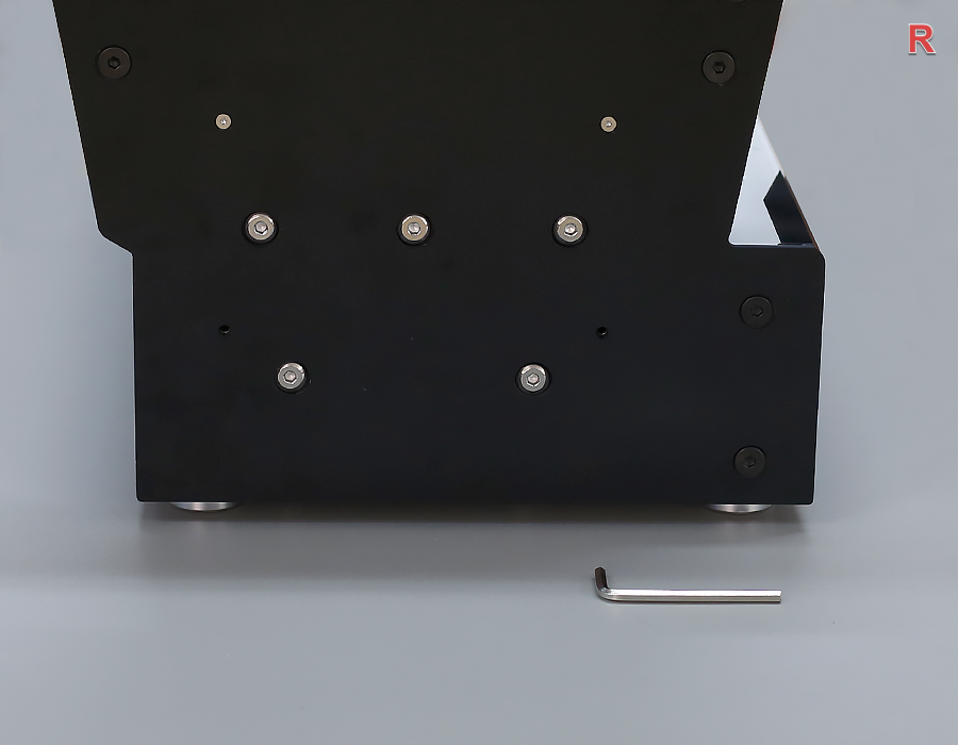
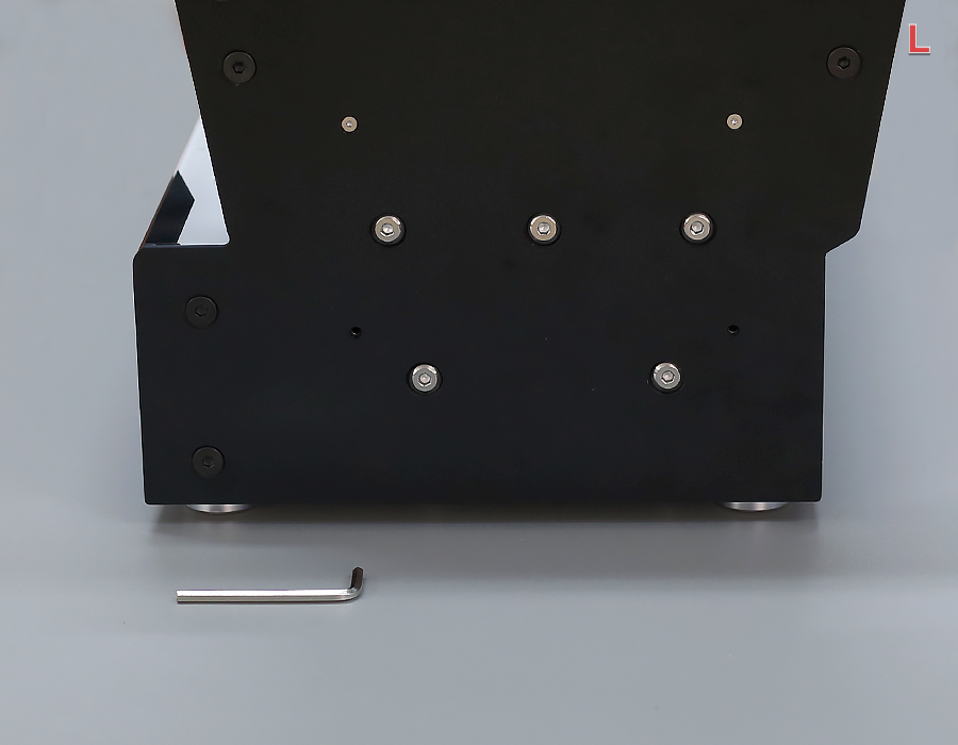
Fully Tighten 7 Screws
Then, completely tighten the 7 screws as shown in the picture.
-
Attach R Panel (Pre-tighten)
Cover the R side panel, use tool C (2.5mm) to fix the screws, first pre-tighten 4 screws, do not tighten them completely.

-
Fully Tighten R Panel Screws
Then, tighten the 4 screws as shown.

-
Assemble L Side Button
Assemble the L side button.
-
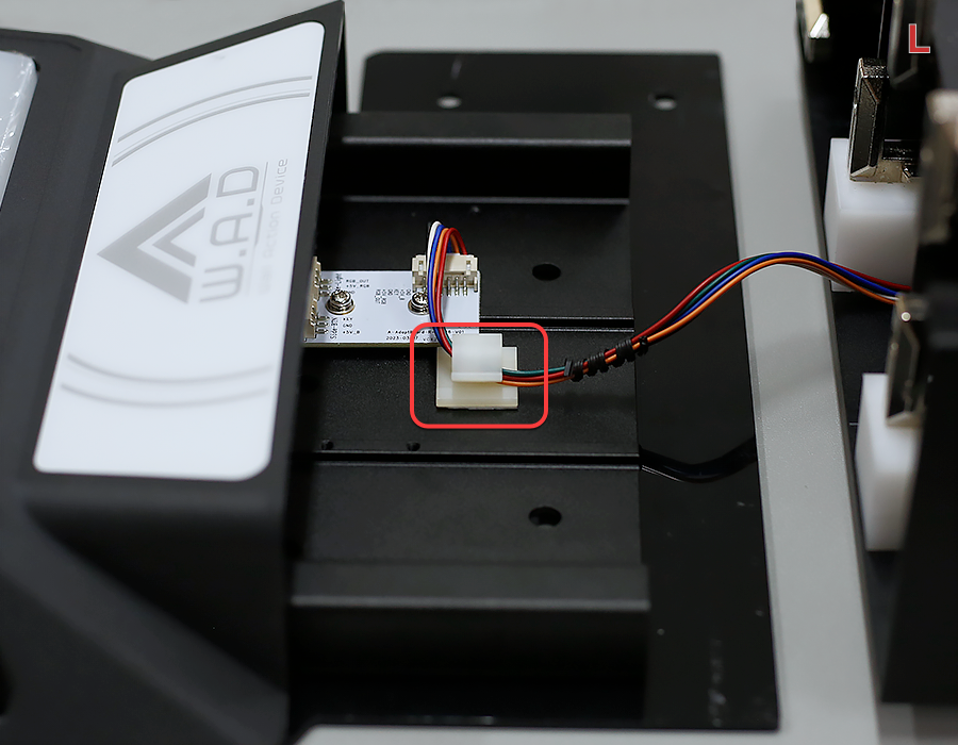
Locate Left Connector
From the side, you can see that the left plug is pasted with paper tape on the side of the main body.

-
Connect Left Cable
Tear off the tape, gently pull the connector (remember not to pull with force), and insert the plug (the plug has a correct orientation — do not force it in).
-
Confirm Left Connection
The wire is plugged in as shown in the picture.
-
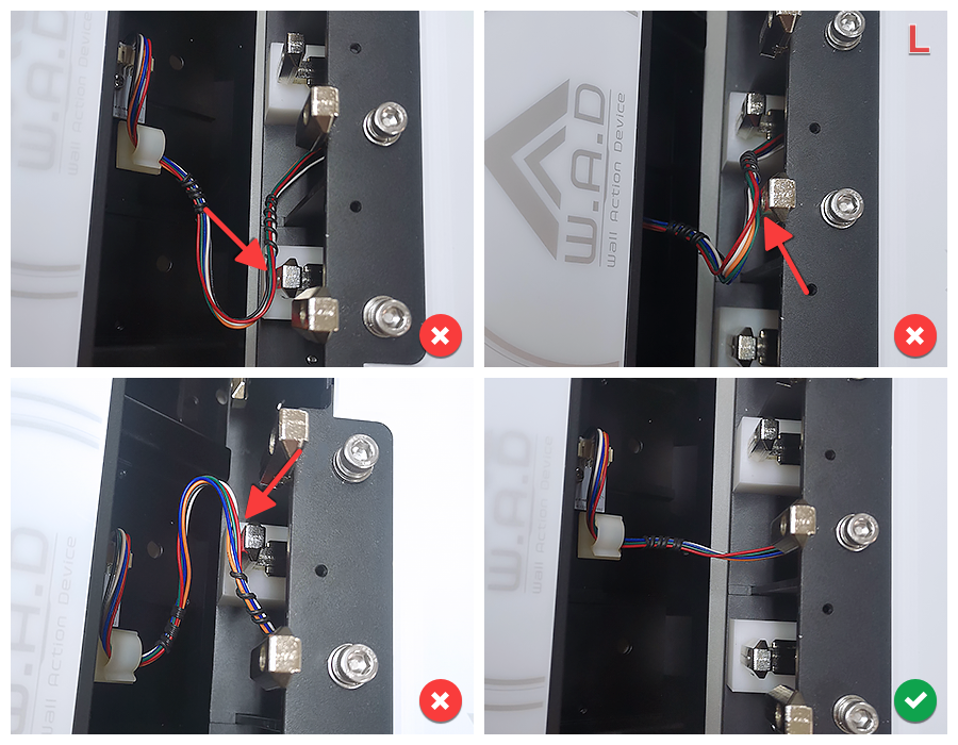
Secure the Left Cable
Secure the wire in the clamp as shown.
-
Close L Side Button
Assemble the L side button.
-
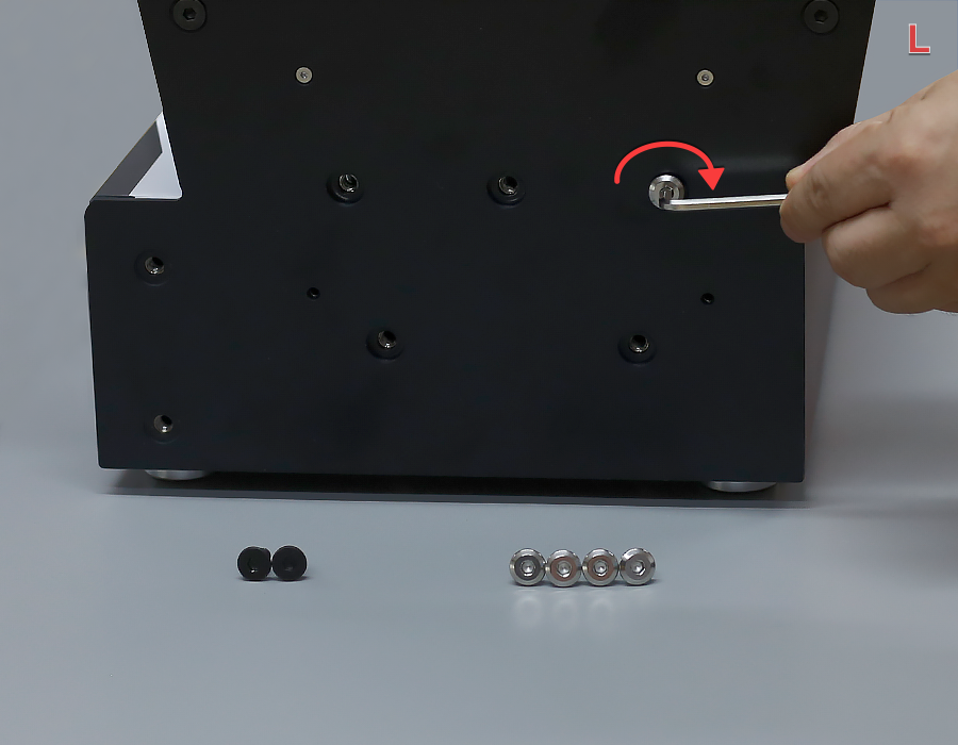
Fix L Side Outer Screw
Use tool D (4mm) to fix the screw on the L side.
-
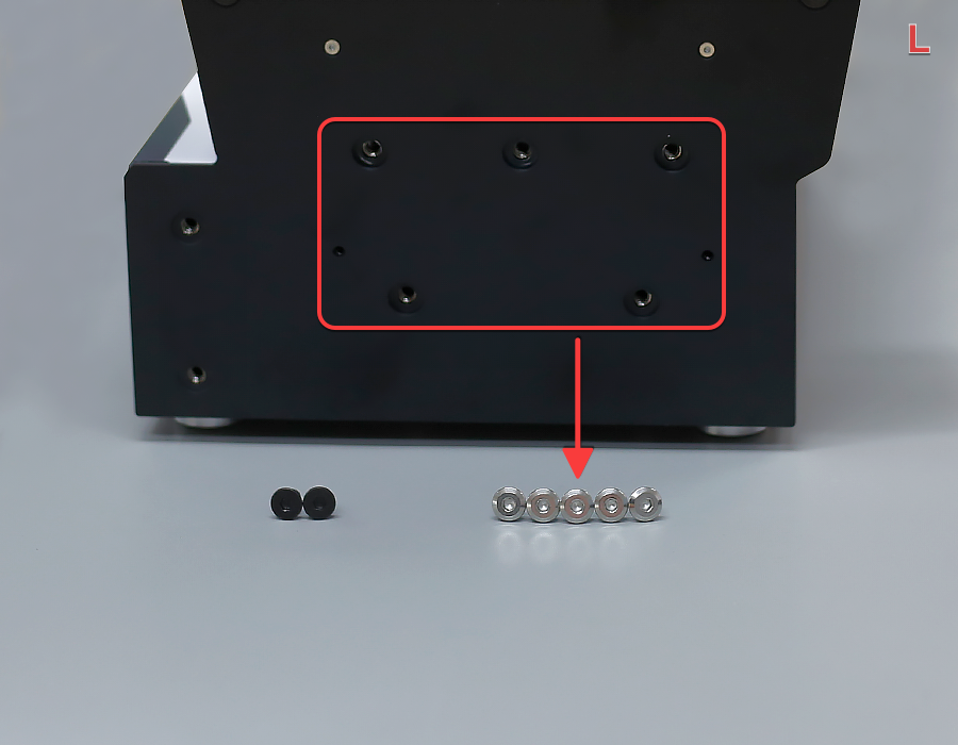
Pre-tighten Left 5 A Screws
First, pre-tighten the 5 silver A screws. Do not tighten them completely to ensure that the side buttons can still move.
-
Pre-tighten Left 2 B Screws
Then, pre-tighten the 2 black B screws. Do not tighten them completely to ensure that the side buttons can still move.
-
Fully Tighten Left 7 Screws
Then, completely tighten the 7 screws as shown in the picture.
-
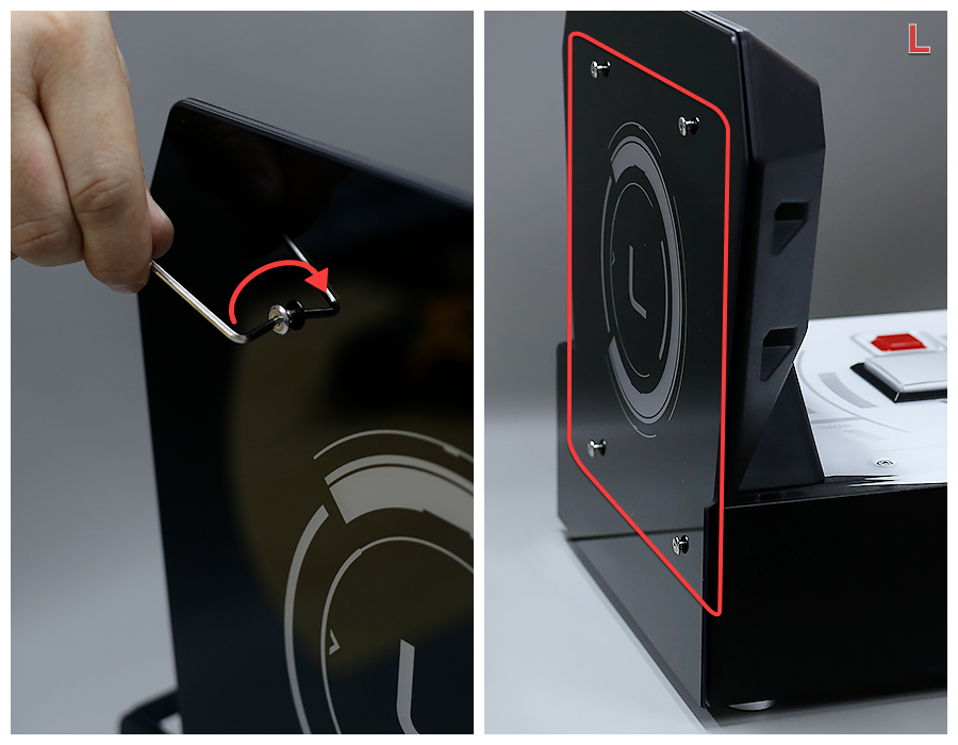
Attach L Panel (Pre-tighten)
Cover the L side panel, use tool C (2.5mm) to fix the screws, first pre-tighten 4 screws, do not tighten them completely.
-
Fully Tighten L Panel Screws
Then, tighten the 4 screws as shown.
-
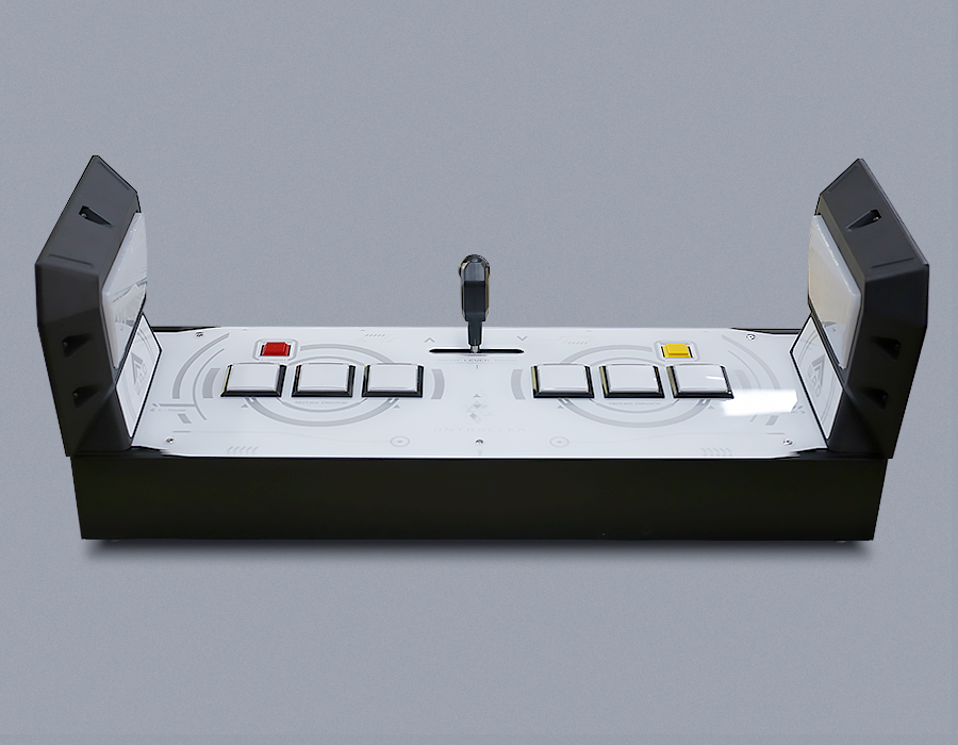
Assembly Complete
The assembly is complete and the finished product is as shown in the picture.
© 2026 GAMO2 Docs